I am always happy to share this recipe and technique for making pepperoni rolls. Bake these and take to your next
tailgate party to score big at the game. They are also perfect to take on hikes, picnics, or any summer event.

The first pepperoni roll was sold at The Country Club Bakery in Fairmont WV in 1927. They originated as a lunch option for the coal
miners in the early 20th century. They do not have to be
refrigerated and are easy to pack in lunch pails.
I think pepperoni rolls, although common in WV, may not be in some other states. We always make them for parties, tailgates, race weekends, camping, and any sports event.
My children knew how to make them when they went to college and their friends always wanted them. When my son moved to Denver, Co the people he met were not familiar with them so now he has them hooked!
They are so easy to make but do involve several hours of prep time.
HOW TO MAKE PEPPERONI ROLLS
Ingredients
(Full list of ingredients and instructions in printable recipe card.)
Rhodes Frozen Dinner Rolls
pepperoni slices
shredded mozzarella cheese
pizza sauce for dipping (optional)
Instructions
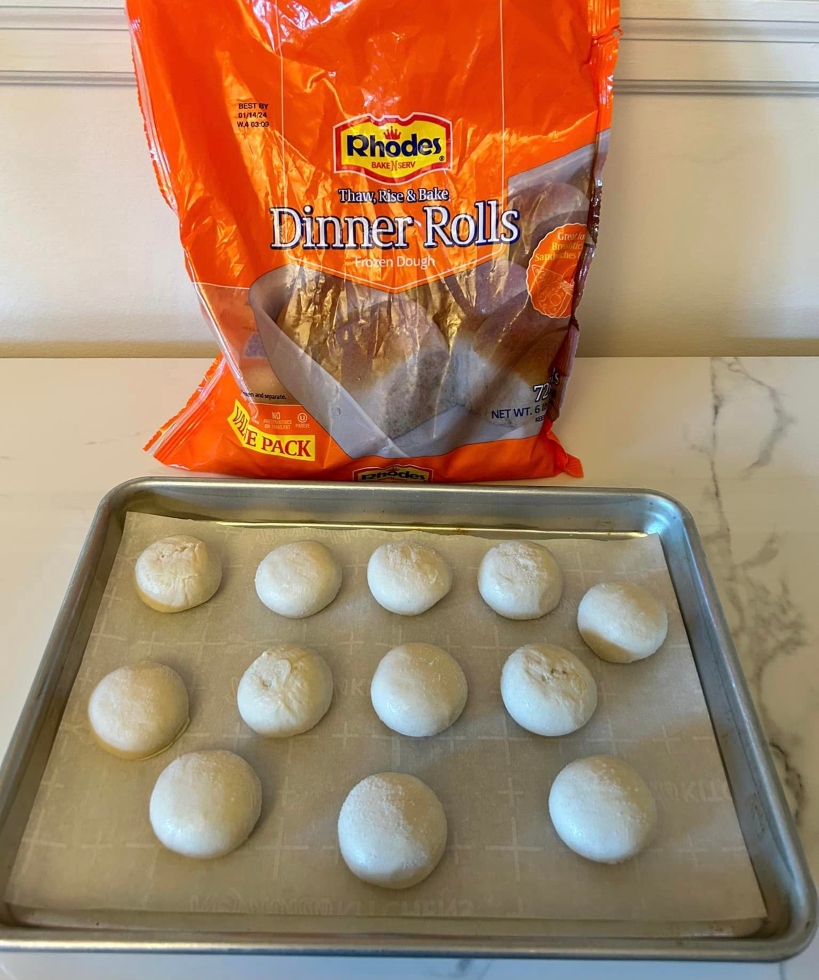
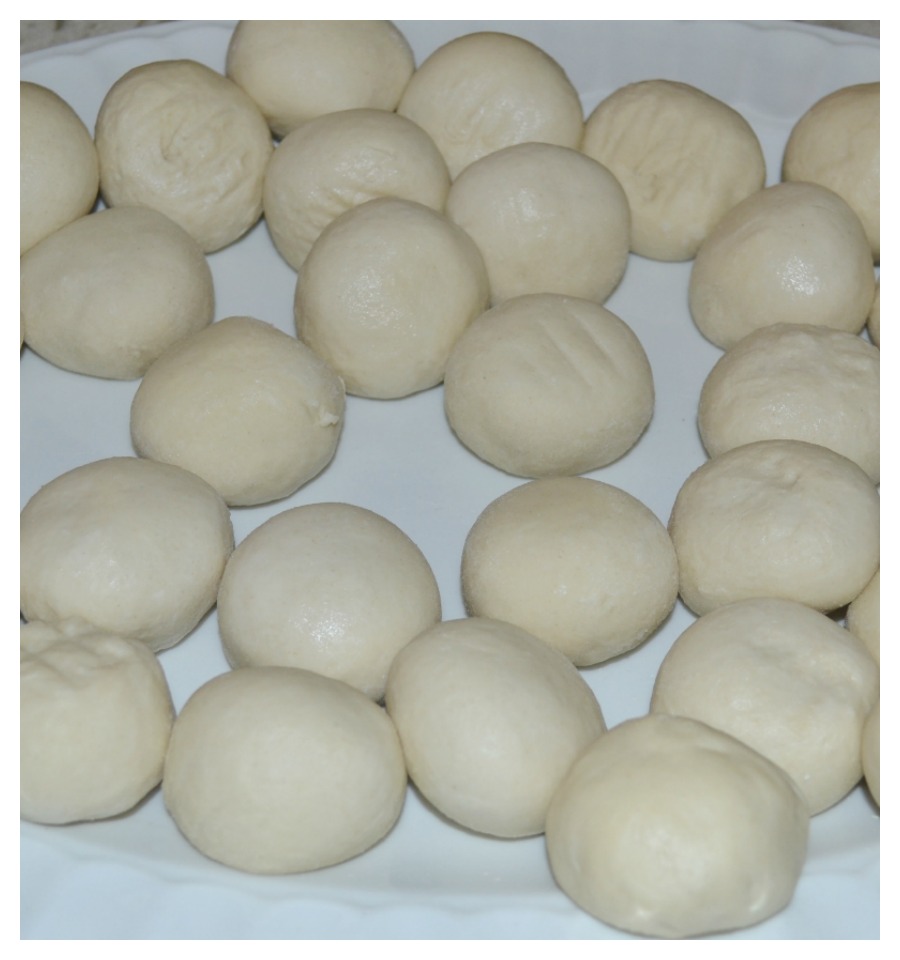
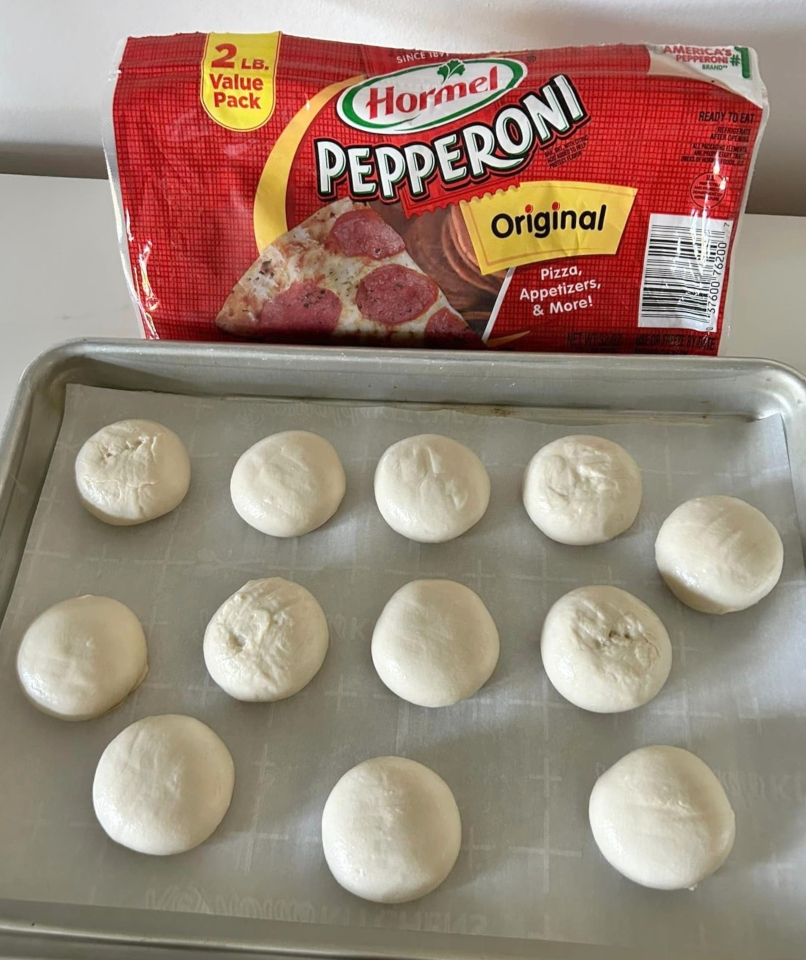
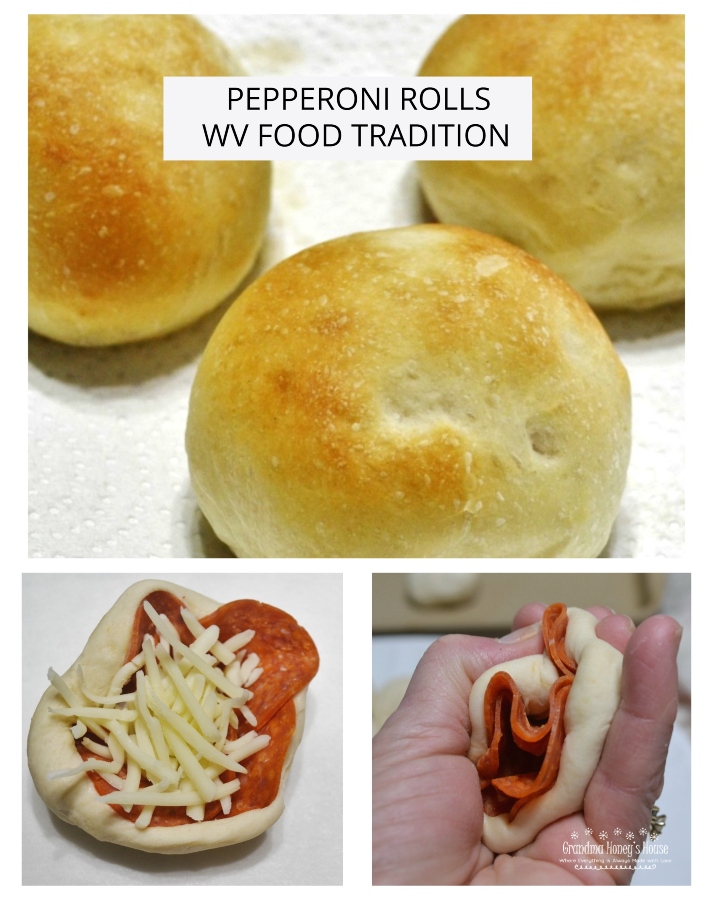
For the pepperoni rolls, I use a bag of frozen rolls (Rhodes). Spread the rolls out on a large tray and allow to thaw until soft, about 1 hour.
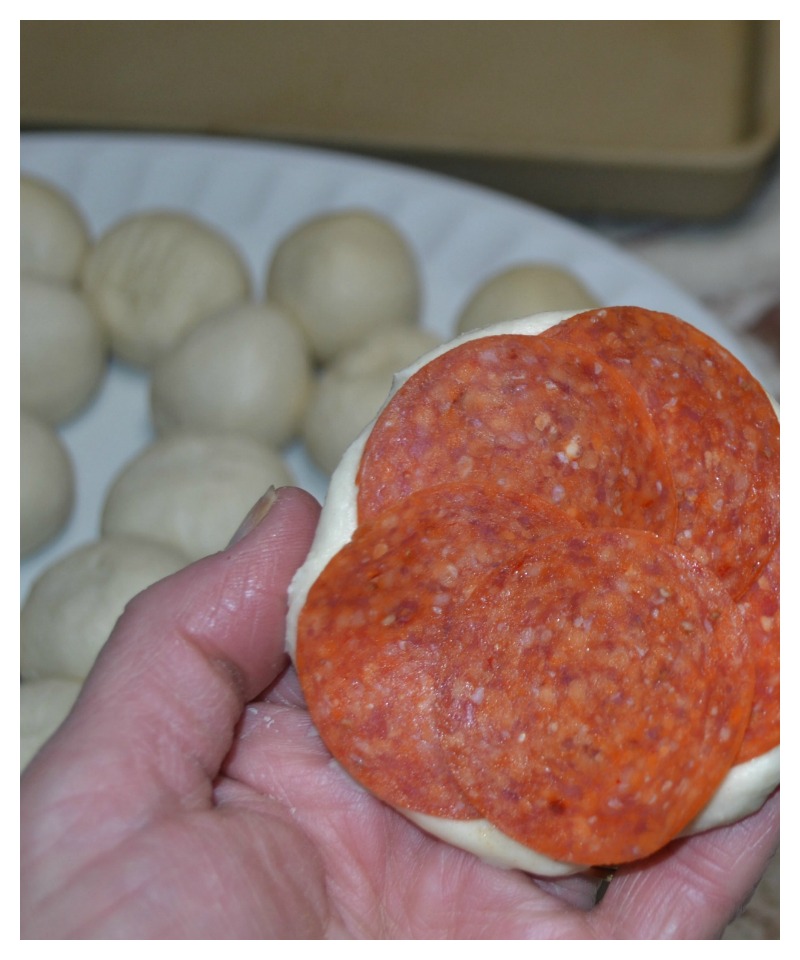
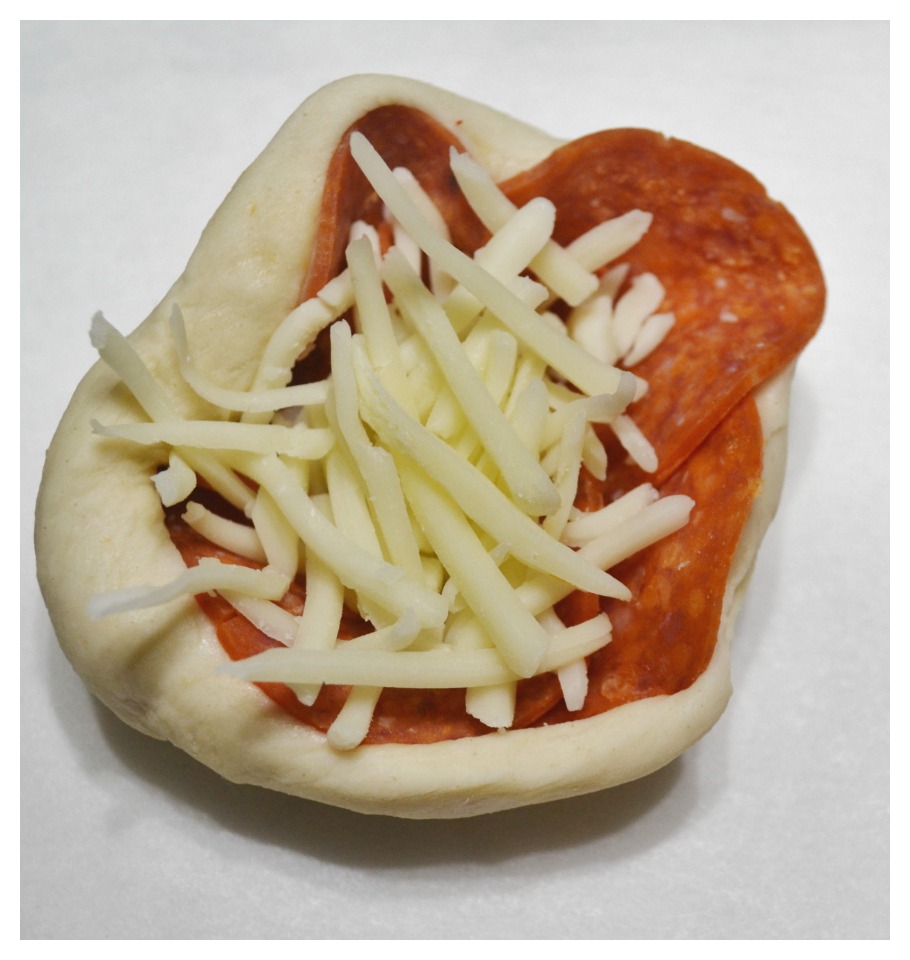
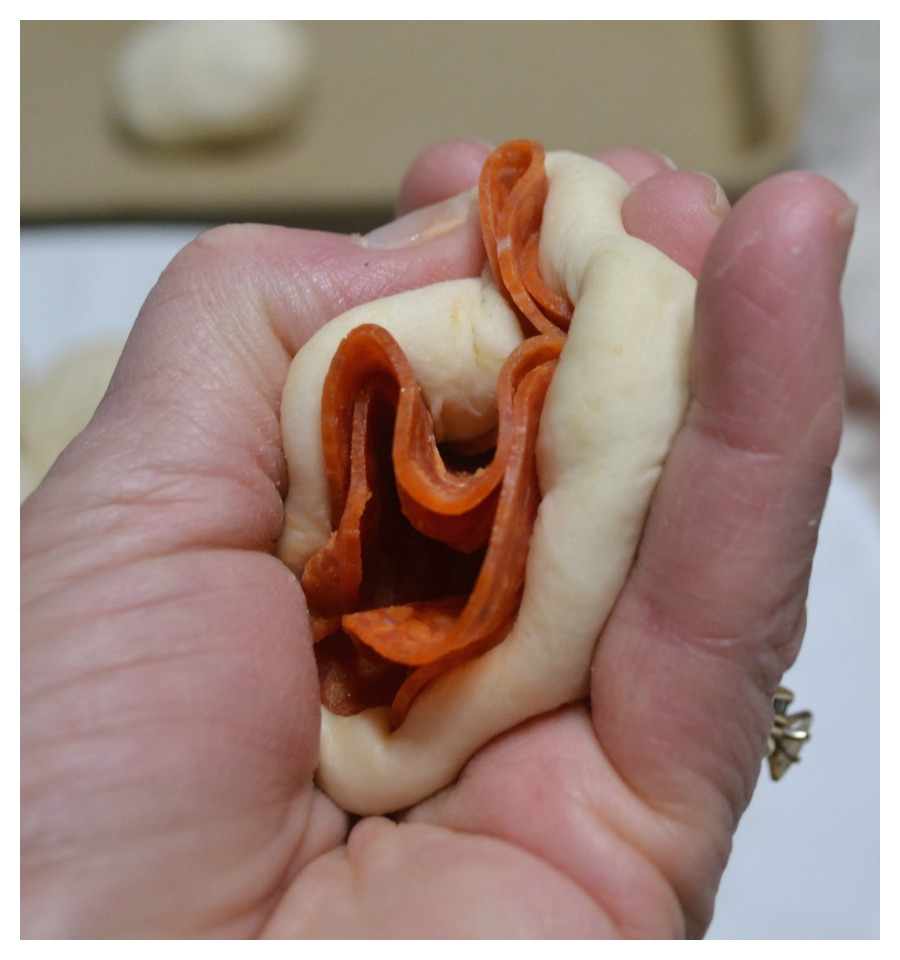 I flatten each roll in my hand, add 6-8 slices of pepperoni, and pull up the sides of the dough to cover.
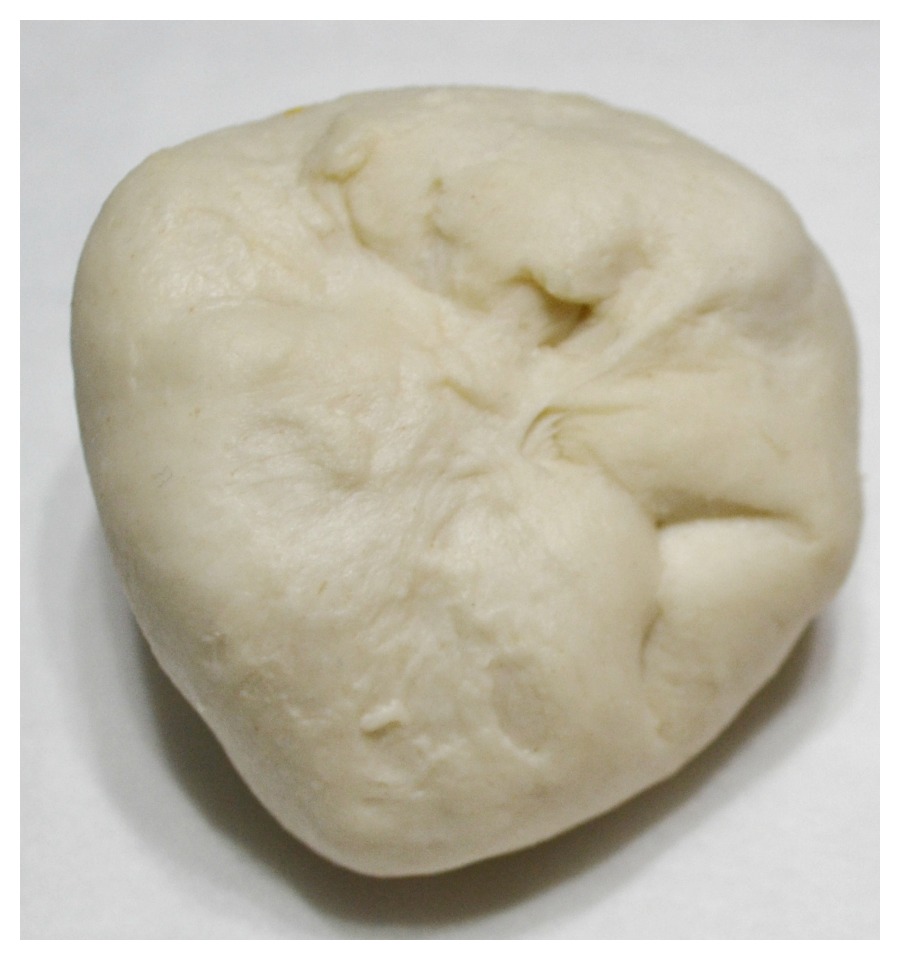
Roll into an oblong or ball shape.
You may also add a small amount of pizza sauce and/or shredded mozzarella cheese if desired before rolling up.
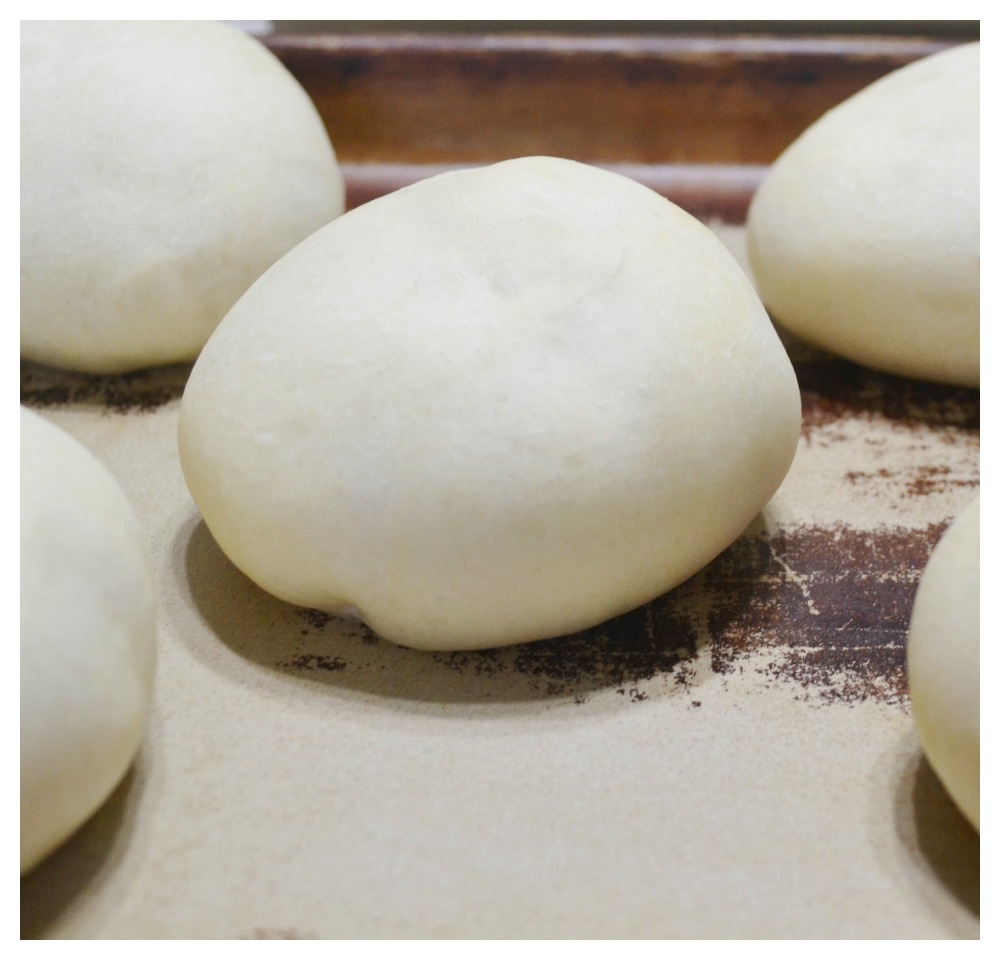 Place rolls on baking sheets, cover with kitchen towel or paper towels, set in a warm area and allow to raise about 3-4 hours. Bake at 350 degrees until light golden brown.
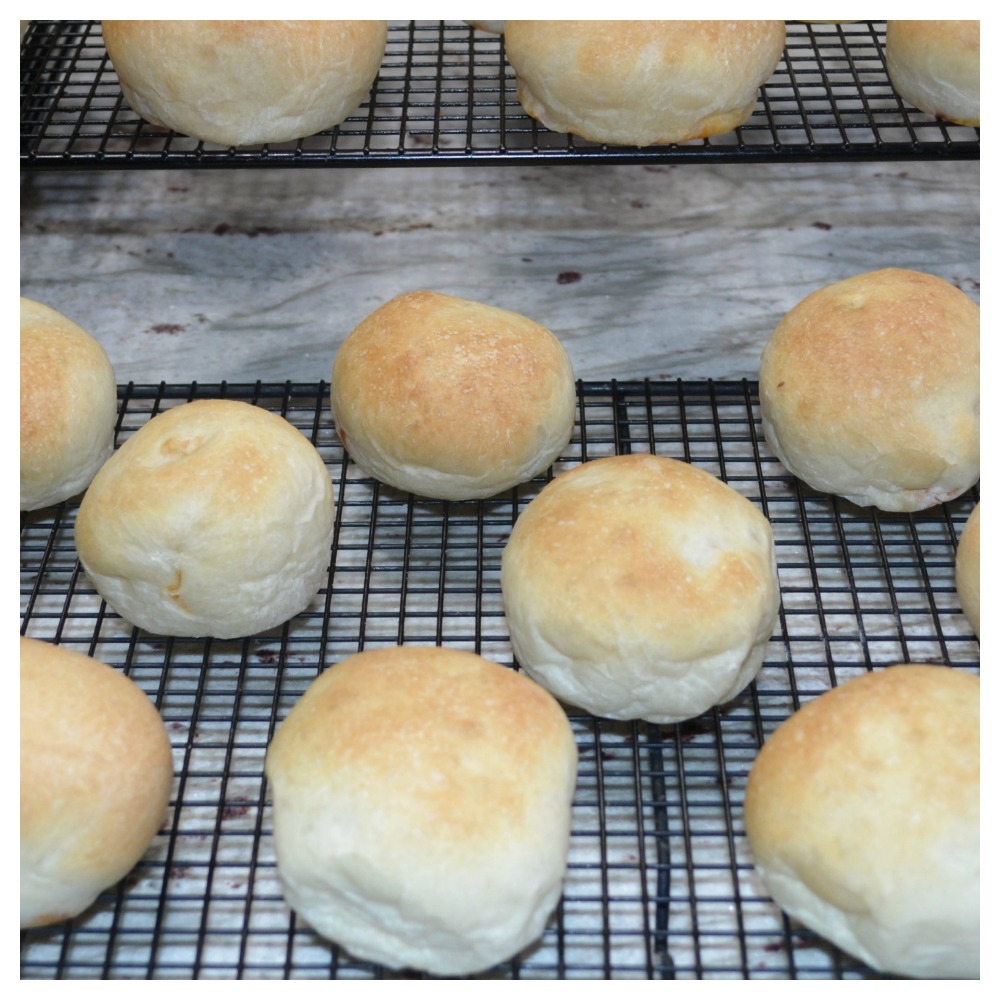
Remove to a paper towel lined plate to drain grease, then to a cooling rack.
I wrap each roll separate in Cling Wrap before taking to events.
The Country Club Bakery in Fairmont WV is the home of the original pepperoni roll. They make the dough from scratch, and ship these all over the United States. One of my friends owns this bakery.
Why You’ll Love Pepperoni Rolls
- They are easy to make and use only a few ingredients.
- They can be made ahead of time and wrapped in Cling Wrap to take to a tailgate, a party or on a road trip. People like to take them in their lunches also.
- You can eat them at room temperature or warm slightly in the microwave.
- In WV, they are always sold at a fundraiser or a treat at sports events.
- Biggest reason is that they taste delicious.
Recipe Tips and Variations
- Allow the dough to thaw for 1 hour prior to putting them together. This will let them be rolled easier and remain smooth.
- Let the rolls raise after the pepperoni is added. I usually do 3-4 hours.
- Remove them from the oven as soon as they are a light golden brown. Allow to set on the pan about 5 minutes. Remove the rolls to a paper towel lined plate to drain grease, then to a cooling rack. Sometimes there will be a lot of grease in the pepperoni.
- Some variations are to add a little sprinkle of mozzarella cheese in with the pepperoni before baking. They are delicious like this when they are warm.
- Another way to serve is with some pizza sauce in a bowl for dipping. If you are traveling with these, this isn’t always possible.
How to Store
I wrap each of mine in Cling Wrap after they cool and put them in baskets or large grocery bags for travel. They are safe to set at room temperature for 1 day. After that, refrigerate and warm up in a microwave.
If they have cheese in them, opinions are mixed if they need to be kept in the refrigerator. Research is split on this. I personally don’t add cheese unless I am serving them to be eaten in a few hours.
Frequently Asked Questions
Can I roll these in different shapes?
YES. I have always made mine in a round or oval shape. Many people roll them in an oblong shape.
Can I use stick pepperoni instead of the slices?
YES. People fix them with both. I learned to make them with the round slices, but both ways are fine. I find that it is harder to get the right amount of pepperoni in with the stick. There could be too much bread.
Will loaves of frozen bread work if I don’t have the rolls?
YES. Thaw it out the using the same instructions, then pinch off the amount of the loaf that would be the size of a roll.

PEPPERONI ROLLS
Ingredients
- 1 bag 36 count frozen dinner rolls
- pepperoni slices about 230
- 2 cups shredded mozzarella cheese optional
Instructions
- Arrange frozen rolls on a large sheet cake pan or platter. Allow space between the rolls.
- Cover with paper towels or kitchen towel, and thaw at room temperature for 1 hour.
- When rolls are softened, flatten a roll in palm of hand. Arrange 6-8 slices of pepperoni in the roll.
- Add small amount cheese if desired.(optional)
- Fold sides up to cover pepperoni and roll into a ball or oval shape. Place on a parchment lined baking sheet.
- Continue doing same with all of the rolls. When arranging on baking sheets, keep about 3 inches between each pepperoni roll. Cover with kitchen towels and allow to rise at room temperature for about 4 hours.
- Bake @ 350 degrees until rolls are light golden brown.
- Remove from baking sheet onto a paper towel lined plate to drain grease from the bottom. Allow to set for about 2 minutes, then transfer to a cooling rack.
- Store in an air tight container or wrap individually in cling wrap.
- Makes 36 rolls.
Notes
- Allow the dough to thaw for 1 hour prior to putting them together. This will let them be rolled easier and remain smooth.
- Let the rolls raise after the pepperoni is added. I usually do 3-4 hours.
- Remove them from the oven as soon as they are a light golden brown. Allow to set on the pan about 5 minutes. Remove the rolls to a paper towel lined plate to drain grease, then to a cooling rack. Sometimes there will be a lot of grease in the pepperoni.
Bake a bag of these pepperoni rolls and take as a treat at
your next tailgate or party and you will not be sorry.
Another popular food to serve at any gathering in WV is Hot Dogs. This Homemade Hot Dog Sauce is the perfect sauce for them.
This post was shared on Weekend Potluck@ Sweet Little Bluebird. This site is full of amazing recipes from great cooks and bakers.
These are delicious!
Thank you. I know that you make delicious ones too.
These look amazing. In the notes it indicates no refrigeration. Does this apply with the cheese added?
Thank you for checking these out. I have always been torn about this. The grocery stores and bakeries here do not refrigerate them, even with the cheese. Answers on line are mixed and most say no, they don’t need it. If I am making them to send on a weekend trip, or something like this, I don’t add the cheese. The times I have added cheese, they have always been eaten the same day, and not refrigerated. The refrigerator dries them out faster. I also asked people here that make them to sell as a business, and they do not refrigerate them. I find that they taste better warmed up slightly when they have cheese in them. My bottom line is that I add cheese when I know I am having a big crowd to eat them or if they will be eaten in 1 day.
It’s funny you don’t use cheese but your 3 rd pick is loaded with cheese and what pepperoni roll doesn’t have cheese or sauce ridiculous
Hi. I think you may have missed some information in the post. I do use cheese sometimes. That is written in the post and in the recipe card. We love the cheese in them when they are warm especially. I do not use it all of the time. If the rolls will be taken someplace where there is no microwave to warm them up, they are not as good with the cheese. Everyone loves mine with or without cheese. I have this sentence in my post ” You may also add a small amount of pizza sauce and/or shredded mozzarella cheese if desired before rolling up.” as well as this following information under Variations..”Some variations are to add a little sprinkle of mozzarella cheese in with the pepperoni before baking. They are delicious like this when they are warm.
Another way to serve is with some pizza sauce in a bowl for dipping. If you are traveling with these, this isn’t always possible.”