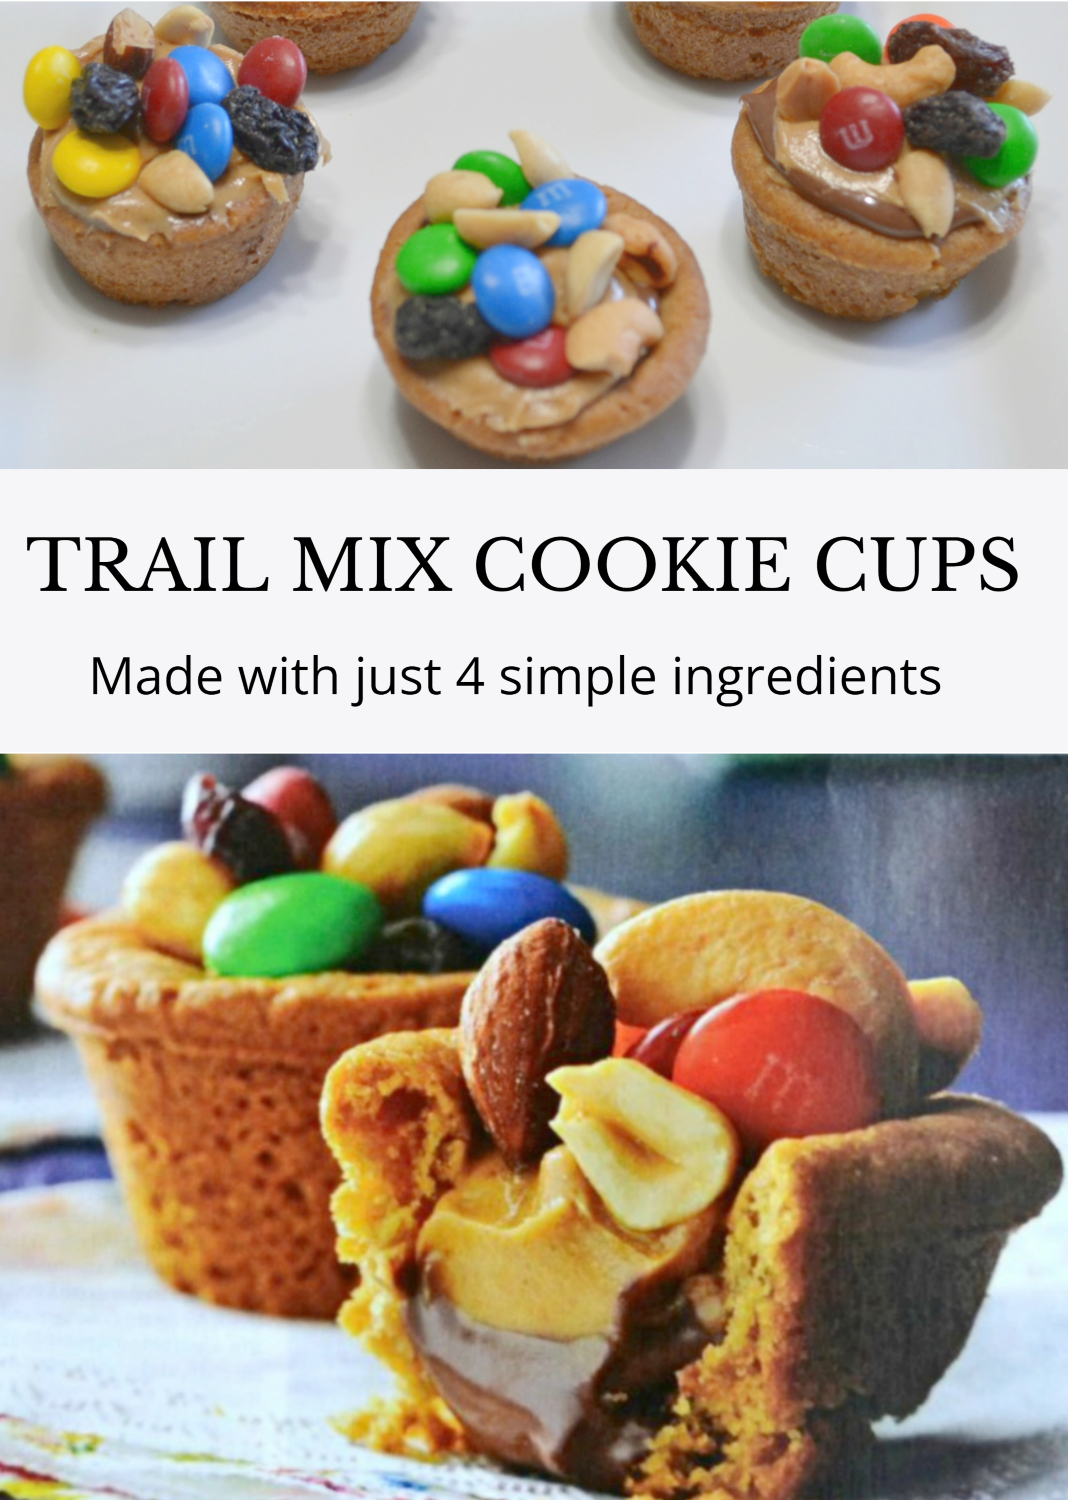
TRAIL MIX COOKIE CUPS
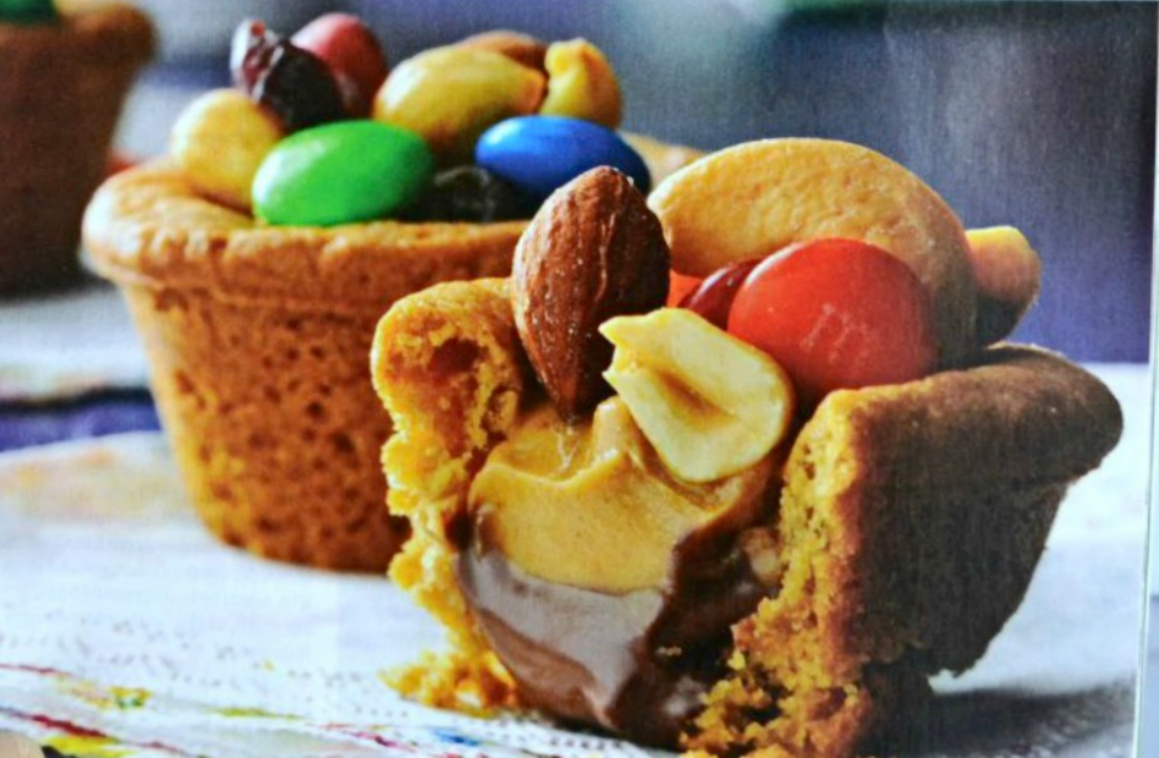
These Trail Mix Cookie Cups are a fun and easy treat made with just 4 simple ingredients! They’re perfect for after-school snacks, holiday trays, or anytime you want something sweet without a lot of work.
I first created these cookie cups several years ago as a snack for my grandchildren, and they were an instant hit.
You really can’t go wrong with peanut butter and chocolate—and when you add a little crunch from trail mix, it makes these cookie cups extra special.
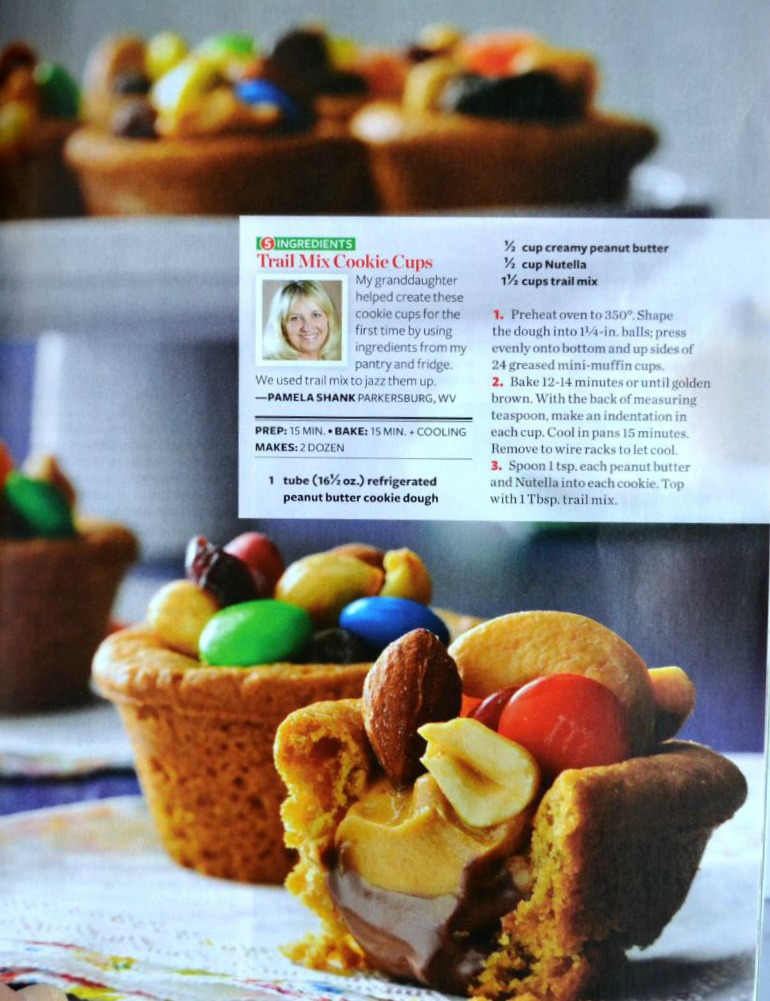
I was honored that these Trail Mix Cookie Cups were featured in a Taste of Home Halloween magazine back in 2015. They’ve been a favorite in our family ever since.
One of the best things about this recipe is how easy and fun it is to make. It’s a great one for kids to help with, and no two cookie cups ever turn out exactly alike—which just adds to the fun!
This was the page from the Taste of Home magazine.
HOW TO MAKE TRAIL MIX COOKIE CUPS
INGREDIENTS
(Full ingredient amounts are in the printable recipe card below.)
- 1 roll (16.5 oz) refrigerated peanut butter cookie dough (Pillsbury)
- Creamy peanut butter (Jif)
- Chocolate hazelnut spread (such as Nutella or Jif)
- Trail mix
INSTRUCTIONS
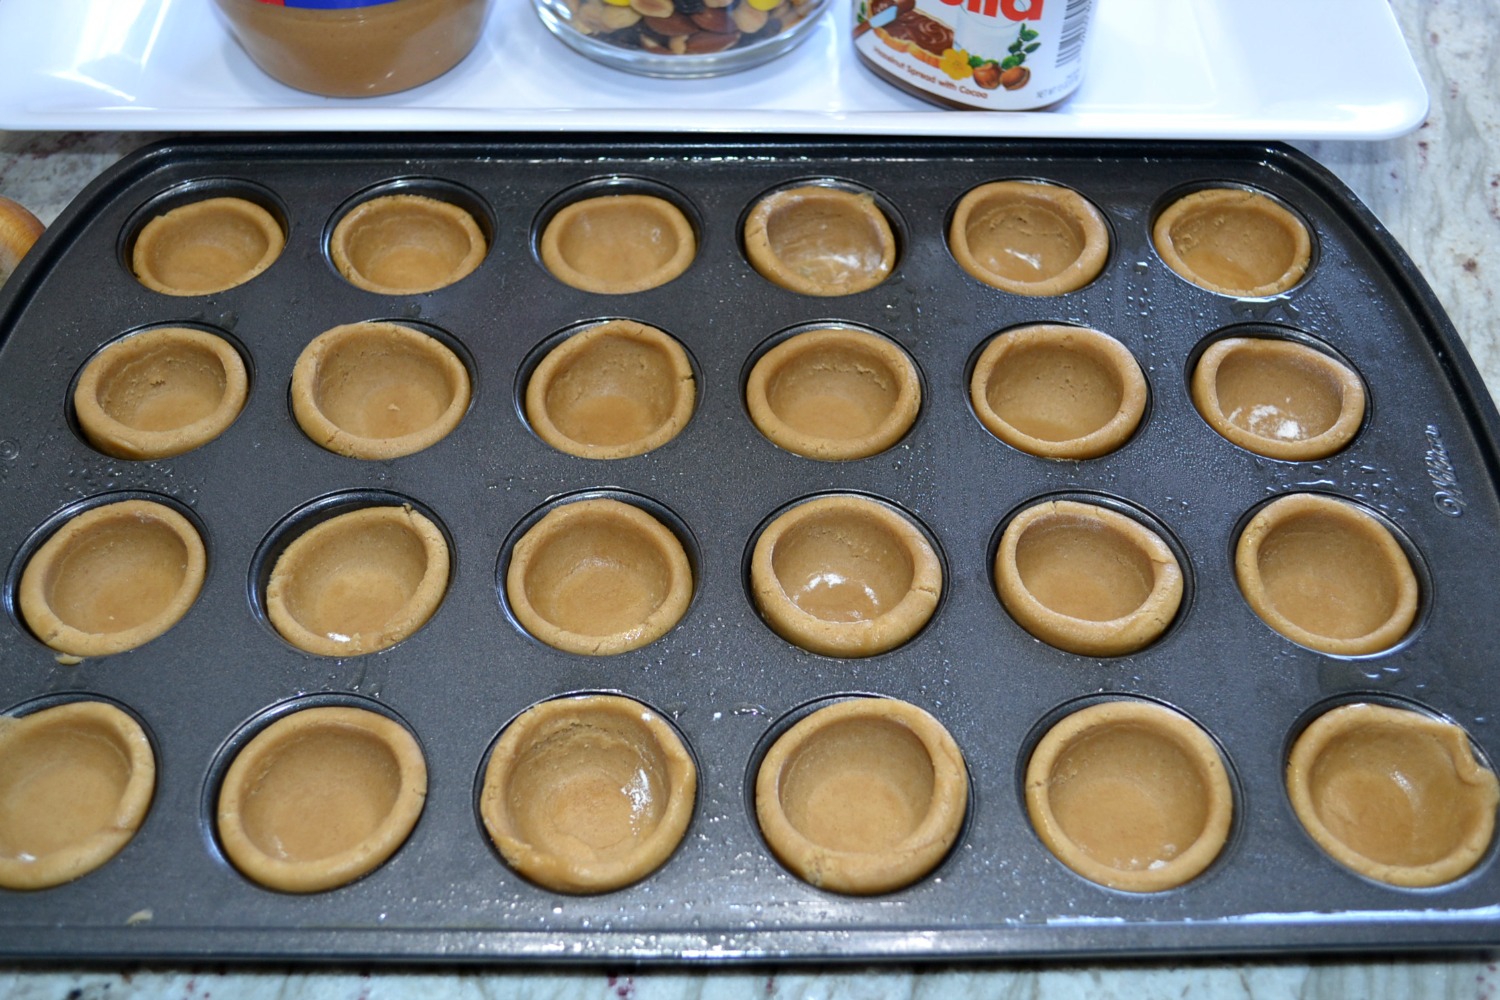
- Preheat oven to 350°F. Spray a 24-cup mini muffin pan with nonstick cooking spray.
- Divide the cookie dough into 24 even portions (about 1¼ inches each) and roll into balls.
- Press each ball into the bottom and slightly up the sides of each muffin cup.
- Make a small indentation in the center of each using a tart shaper or the end of a wooden spoon.
- Bake for 12–14 minutes, or until lightly golden brown.
- Remove from the oven and immediately press the centers down again to create a deeper cup shape.
- Let cool in the pan for 15 minutes, then carefully remove to a wire rack to cool completely.
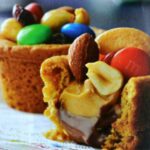
- Spoon about 1 teaspoon of chocolate hazelnut spread and 1 teaspoon of peanut butter into each cup. (It doesn’t matter which goes in first!)
- Top each cookie cup with about 1 tablespoon of trail mix.
- Transfer to a serving platter and enjoy!
Step by Step Photos

Easy ingredient line-up.
Preheat oven to 350 degrees F. Spray 24 cups of mini muffin pan with non stick cooking spray.
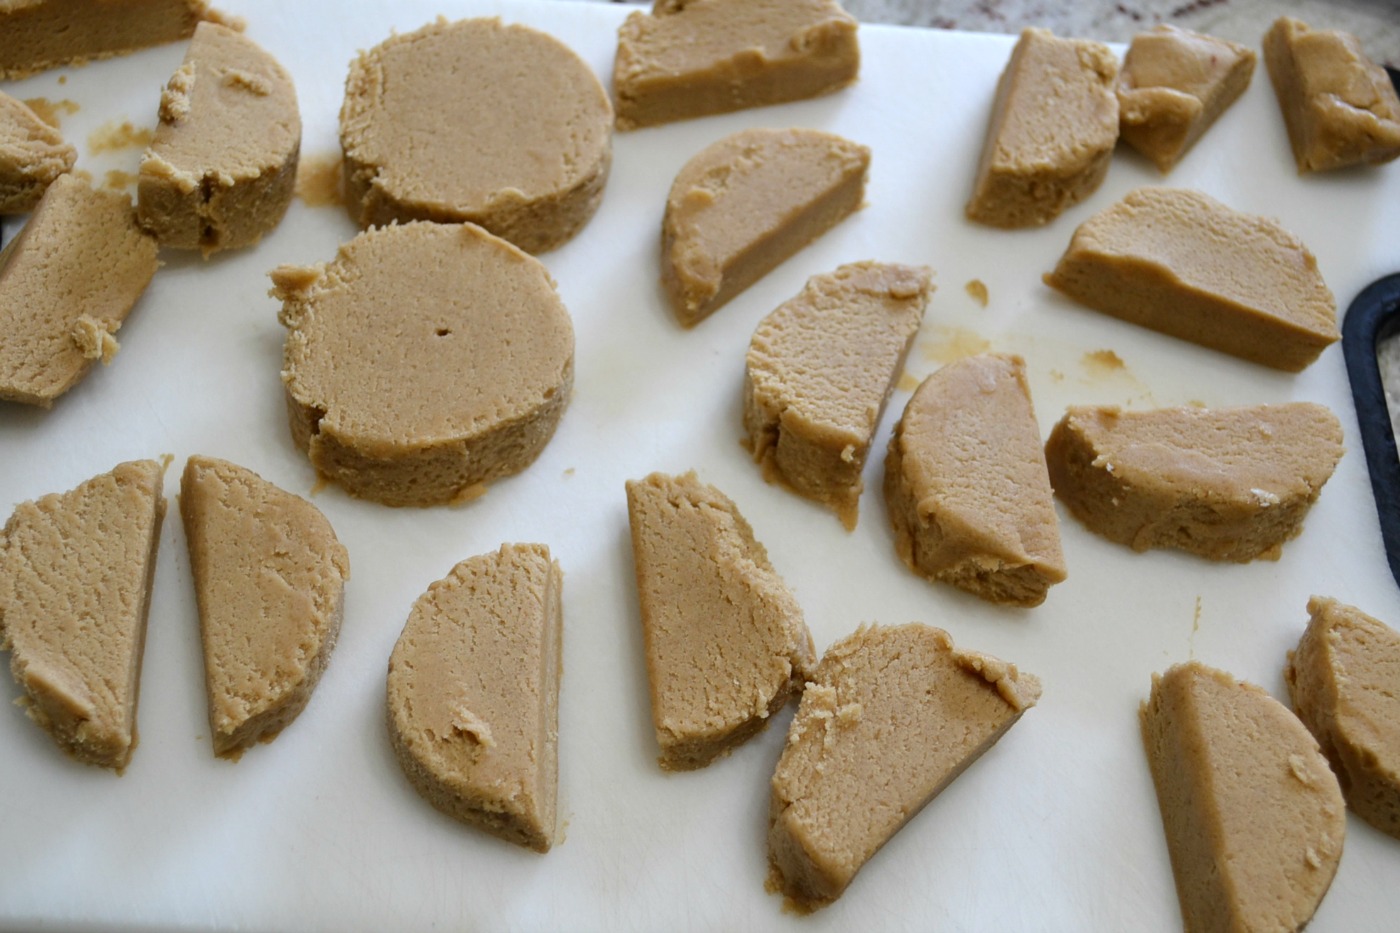
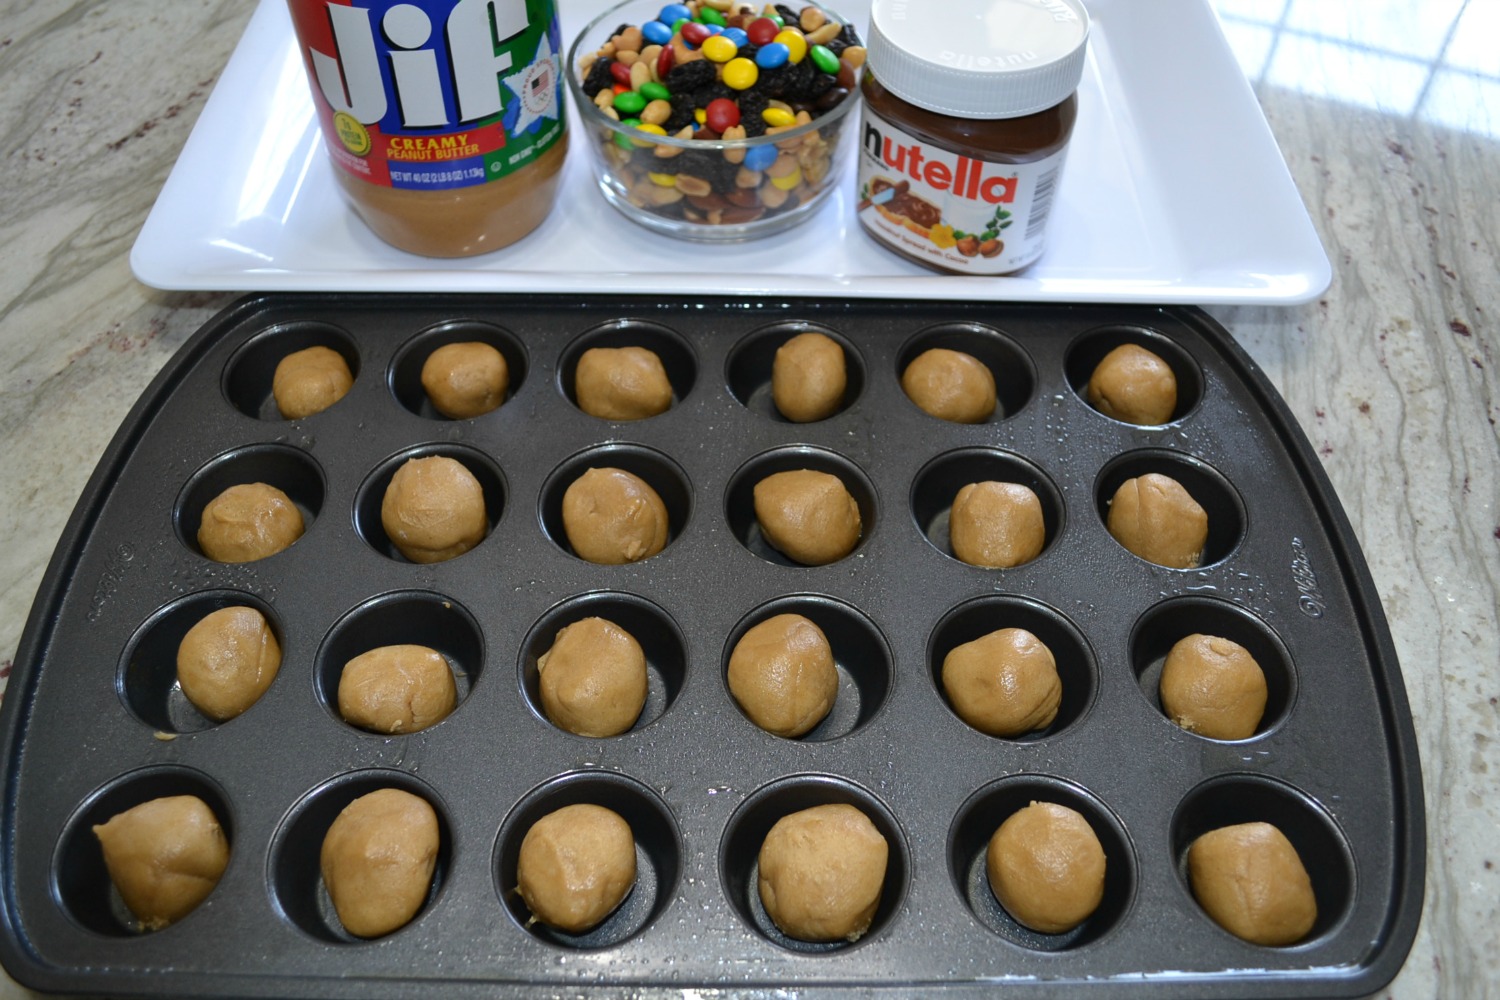 Shape the dough into (24) even size balls, about 1 1/4 inch each. Press each into the bottom and up sides of a muffin cup.
Make indentation in each with wooden tart maker.
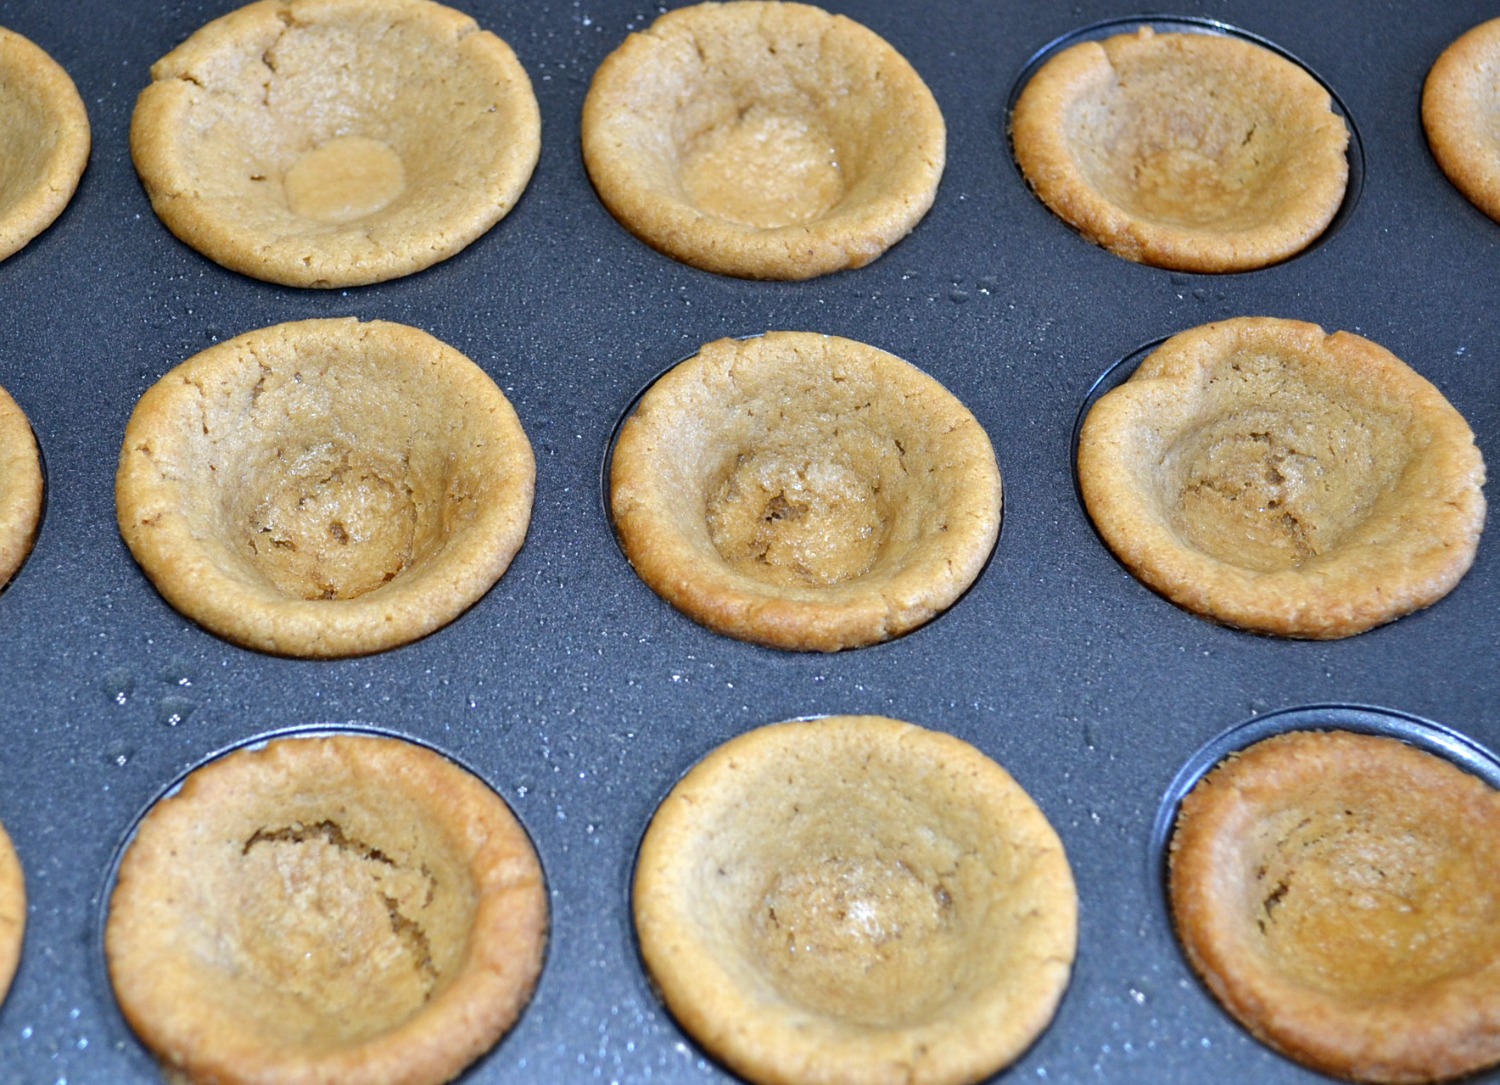
Bake for 12-14 minutes or until light golden brown. Remove from the oven and make an indentation in the center of each cup, using a wooden tart maker or the end of a wooden spoon handle.
Cool in the pan for 15 minutes, and then remove to a cooling rack.
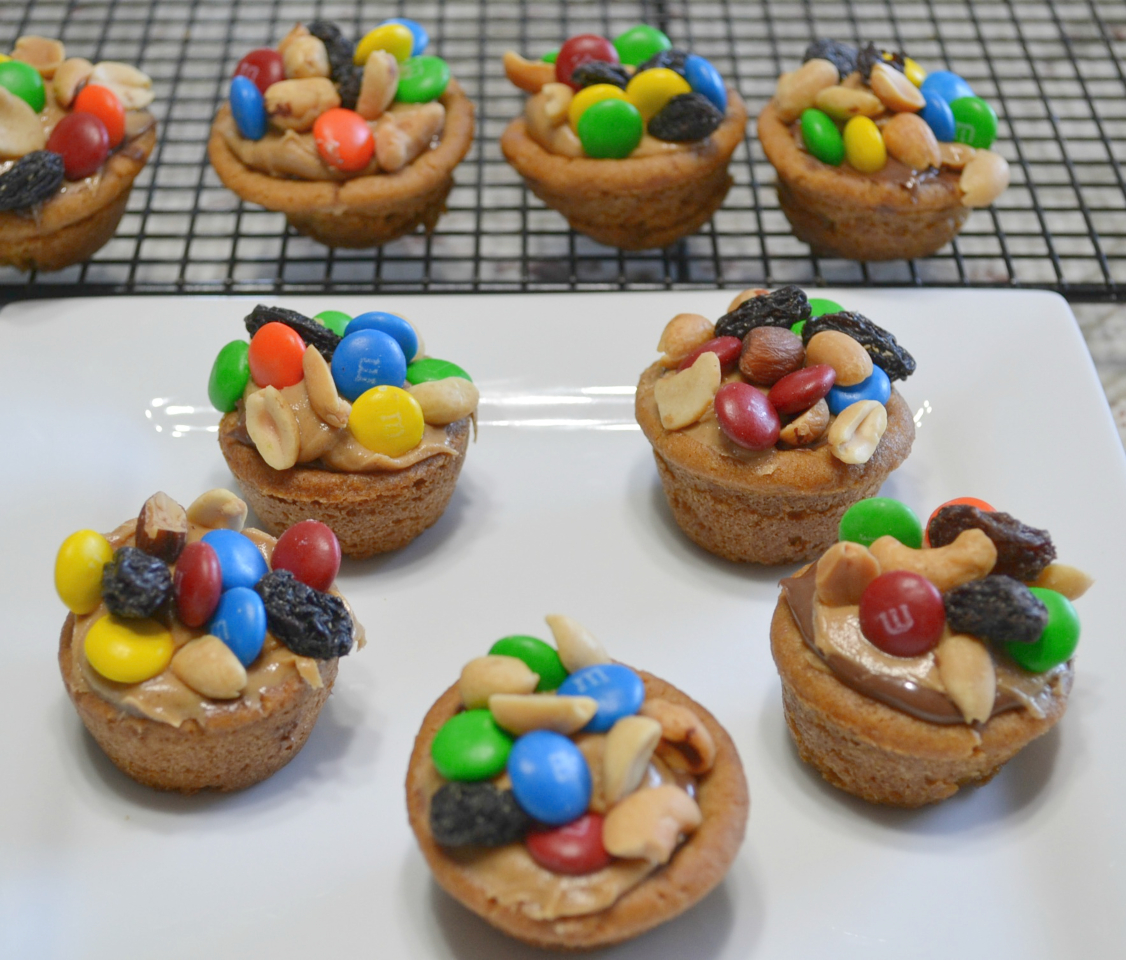
Spoon 1 teaspoon of the chocolate spread and then 1 teaspoon of peanut butter into each cup. Top with a tablespoon of the trail mix. Transfer to serving platter and enjoy.
WHY YOU WILL LOVE THESE COOKIE CUPS
- Made with just 4 simple ingredients
- Quick and easy to prepare
- Perfect for kids to help make
- A fun mix of sweet, salty, and crunchy
- Great for parties, school snacks, and gatherings
- Easy to transport in an airtight container
HELPFUL TIPS WHEN MAKING TRAIL MIX COOKIES
- Use a tart shaper, or spoon handle to create the perfect indentations
- Press the centers again right after baking for best shape
- Don’t worry about making them perfect—each one is unique
- Let the cookie cups cool before filling so the spreads don’t melt too much
Frequently Asked Questions
How do I make indentations in the cookie cups?
The best way is to use a tart shaper, a small shot glass, small medicine cup, or a wooden spoon handle. I do this prior to baking them. You will need to do it again, as soon as the pan comes out of the oven. As the cookie cups cool, the shape will stay.
Can I make the cookie cups ahead of time?
YES, I have made them the day before I will be filling them. Place in an airtight container and store at room temperature. They can also be frozen in airtight containers or Ziploc bags and keep for about a month.
Another fun peanut butter cookie recipe is
Triple Peanut Butter Cookie Delights
This post was shared on Sweet Little Bluebird Weekend Potluck.
TRAIL MIX COOKIE CUPS
Ingredients
- 1 roll 16.5 oz refrigerated peanut butter cookie dough
- 1/2 cup creamy peanut butter
- 1/2 cup chocolate hazelnut spread Nutella or Jif
- 1 1/2 cups trail mix
Instructions
- Preheat oven to 350 degrees F. Spray 24 cups of mini muffin pan with non stick cooking spray.
- Shape the dough into (24) even size balls, about 1 1/4 inch each. Press each into the bottom and up sides of a muffin cup.
- Bake for 12-14 minutes or until light golden brown. Remove from the oven and make an indentation in the center of each cup, using a wooden tart maker or the end of a wooden spoon handle. Cool in the pan for 15 minutes.
- Carefully remove each cookie cup and place on a wire cooling rack.
- Spoon 1 teaspoon of the chocolate spread and then 1 teaspoon of peanut butter into each cup. Top with a tablespoon of the trail mix. Transfer to serving platter and enjoy.
Notes
The best way is to use a tart shaper, a small shot glass, small medicine cup, or a wooden spoon handle. I do this prior to baking them. You will need to do it again, as soon as the pan comes out of the oven. As the cookie cups cool, the shape will stay. Can I make the cookie cups ahead of time?
YES, I have made them the day before I will be filling them. Place in an airtight container and store at room temperature. They can also be frozen in airtight containers or Ziploc bags and keep for about a month.
These Trail Mix Cookie Cups are one of those simple recipes that bring a lot of smiles. Whether you’re making them with your grandchildren or for a special occasion, they’re always a fun and delicious treat.
What fun but then I love anything with peanut butter! Such a cute idea. Thanks!
These look so yummy! The kiddos would love them. Pinning!
Thank you so much. You are very kind!
These are unique—my husband is one who believes peanut butter and chocolate are a food group. He thinks your combo sounds like one he would like. Visiting from Happiness is Homemade linkup.
Ha! That’s funny. I never thought of it as a food group, but he could be right. Thank you.
Terrifically cute! And congratulations on being published! I think I told you that shortly after we first “met” through our blogs, I paged through a magazine while standing in line at Michael’s – and there you were! Another great prize recipe and your pretty face right next to it!
What an outstanding after school snack for the kids to prepare and share with them.
I visited you via EASY SALMON PATTIES – WEEKEND POTLUCK #595
I linked up this week with = Whole Salmon Fillet Cakes and
Salmon Spinach Quiche with Crust. This is a friendly reminder to come and join us at SeniorSalonPitStop. You will find the linkup information under BLOGGING.